Table of Contents
ToggleIf you’ve been grinding through Hogwarts Legacy and hit a wall when “In the Shadow of the Study” popped up on your quest log, you’re not alone. This particular quest sits at a sweet spot in the game’s progression, challenging enough to feel rewarding, but approachable with the right strategy. Whether you’re a completionist hunting every collectible or just trying to push the story forward, nailing this quest requires knowing what you’re walking into. We’re breaking down everything you need to unlock it, survive the combat encounters, grab the hidden loot, and understand why it matters to the narrative. Let’s get into it.
Key Takeaways
- In the Shadow of the Study is a mid-game story quest in Hogwarts Legacy that requires level 18–25 and introduces crucial narrative elements tied to the game’s main storyline and endgame content.
- Master combat encounters by prioritizing control spells like Stupefy and Protego alongside damage dealers such as Bombarda or Incendio, then use Ancient Magic Focus abilities strategically to interrupt high-threat enemies.
- The quest area contains four hidden chests rewarding thorough exploration; scan for destructible walls, side corridors, and tucked-away spaces for valuable gear and spell loot.
- Completing In the Shadow of the Study unlocks new spells, legendary equipment, narrative branching options, and access to additional map areas that expand gameplay possibilities.
- If you struggle with the mini-boss encounter, focus on patient spell rotation and positioning rather than raw damage output, and upgrade your gear if damage feels consistently weak.
What Is the Shadow of the Study in Hogwarts Legacy?
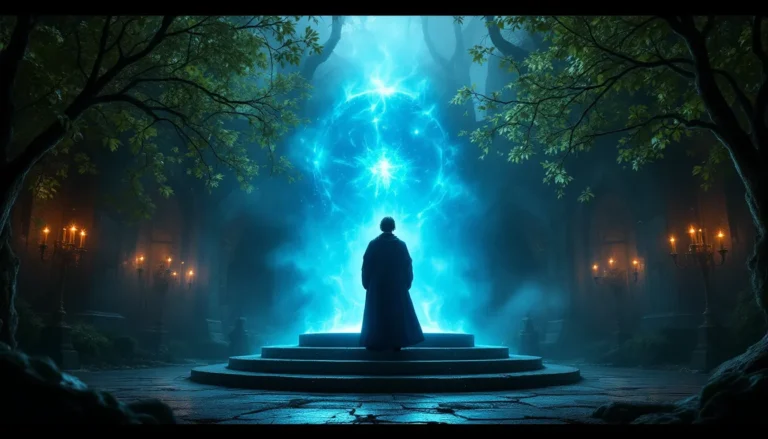
“In the Shadow of the Study” is a story quest that deepens the mystery surrounding the hidden magical secrets scattered throughout Hogwarts and its grounds. This quest centers on exploration and uncovering the truth behind a specific location tied to the main narrative. It’s not a side quest you can casually ignore, completing it unlocks crucial story beats and pushes character development forward.
The quest gets its name from the literal setting: a shadowy study area filled with magical artifacts, enemies, and environmental puzzles. Without spoiling too much, this location becomes a focal point for understanding the broader conflicts you’ll face in the game. The atmosphere here is distinctly darker than earlier areas, with better enemy types and more complex layouts. Think of it as the game ramping up difficulty while maintaining that immersive Harry Potter feel.
Timing-wise, most players encounter this quest around the mid-game stage, roughly 20-30 hours in depending on how much side content you’ve tackled. By that point, you should have a solid spell loadout and decent health pools, but you’ll still need to play smart. The quest isn’t a slog, it’s typically a 30-45 minute experience once you know where to go.
How to Unlock the Shadow of the Study Quest
Prerequisites and Requirements
Before you can jump into this quest, you need to hit specific progress gates. First, you’ll need to have advanced far enough in the main storyline, specifically, completing at least one major questline that introduces certain characters and world mechanics. You can’t just teleport to this quest at level 5: the game gates it behind story progression for good reason.
Second, your combat readiness matters. While the game doesn’t enforce a hard level requirement, showing up under-leveled gets punishing fast. Most guides recommend being at least level 18-22, though level 25+ makes things significantly smoother. This isn’t just about health pools either, you need access to better spells through progression, which tied to reaching specific story chapters.
Third, you’ll want to have unlocked at least one Ancient Magic focus ability. This becomes critical for certain combat encounters. You don’t need a maxed-out loadout, but having options helps.
Step-by-Step Progression Guide
Once those prerequisites are met, the quest triggers naturally through story dialogue. You’ll get a journal entry and a quest marker pointing you toward a specific location. Don’t ignore the journal entry, it provides context clues about where to go, which matters if you wander off the beaten path.
The initial phase involves navigating to the study location. This isn’t pure combat: you’ll solve some environmental puzzles along the way, similar to other Hogwarts Legacy puzzle mechanics. If you’ve tackled Hogwarts Legacy Dice Door: Unlock Treasures or Face Frustration, you’ll recognize the design philosophy here. Pay attention to your surroundings, interactive objects glow slightly and respond to specific spells.
Once inside the study area, you’ll face multiple enemy encounters in sequence. This is where build matters. The enemies here use a mix of ranged and melee attacks, so flexibility in your spell selection is crucial. After the first enemy wave, you’ll encounter a mini-boss encounter that serves as a skill check. Defeat it cleanly and you’re in good shape for the rest of the quest.
The final phase involves a story-driven confrontation and more puzzle-solving to lock down the location. This part is less about raw combat and more about understanding the mechanics the game has been teaching you all along. Complete the objectives the game marks on your screen, and the quest wraps up with a cinematic that impacts the narrative going forward.
Combat Strategies and Enemy Breakdown
Enemy Types You’ll Encounter
The study area throws several enemy types at you, each with distinct behavior patterns. First up: Dark Wizards. These casters spam ranged spells from distance and have moderate health pools. Their attacks hit hard but telegraph clearly, dodge roll is your friend here. They’re weak to Stupefy (a control spell that stuns) and any offensive spell with knockback effect.
Dark Soldiers form the secondary enemy type. These are melee-focused enemies with better defenses than standard encounters earlier in the game. They carry shields and block frequently, making pure damage output less effective. Use Diffindo or Incendio to break their shields, then follow up with heavy-hitting spells like Bombarda.
Finally, there’s the mini-boss enemy, a higher-HP variant with mixed attack patterns. This enemy combines wizard and soldier tactics: it casts spells while also closing distance for melee attacks. Treating it like a damage race is the wrong play. Instead, focus on control: stun it when possible, create distance with knockback effects, and time your damage bursts between its defensive phases.
All enemies in this area are susceptible to Ancient Magic Focus attacks when you build up enough meter through normal combat. These attacks deal massive damage and interrupt enemy actions, use them strategically on the mini-boss or when you’re getting overwhelmed by numbers.
Best Spells and Builds for This Quest
Your spell loadout should include a mix of control, damage, and defense. Here’s the optimal setup for most players:
Primary Damage: Use Bombarda or Incendio as your main damage source. Bombarda excels against shields and armor: Incendio is better for raw DPS when enemies are already exposed. If you’ve progressed far enough to unlock Confringo, that’s top-tier for this fight, it deals heavy damage and applies a burn effect that stacks.
Control/Utility: Stupefy is non-negotiable. Stun enemies to interrupt their attacks, create breathing room, and set up Ancient Magic Focus combos. Levioso lifts enemies into the air, removing them from the fight temporarily. Combine these two and you control the entire encounter.
Defense: Equip Protego as your shield spell. It blocks damage and can be upgraded with talents to reflect projectiles back at enemies, incredibly useful when Dark Wizards are spamming spells.
Auxiliary: Expecto Patronum if you’ve unlocked it, the damage and crowd control is phenomenal. If not, Flipendo works as a safe knockback option.
For talents, prioritize Curse-Breaking talents if you’ve earned them, as several enemies here apply damage-over-time effects. Also stack damage talents relevant to your primary spell choices. Your gear should emphasize spell power and health: balance matters more than min-maxing raw attack stats.
Tactically: Open encounters with Stupefy to control the initial burst, then layer in damage spells while enemies recover. If things get dicey, swap to defensive casting with Protego and wait for Ancient Magic meter to build. Never stand still, move constantly to avoid incoming attacks. Use environmental objects (crates, pillars) for cover when needed.
Collectibles and Secrets Within the Quest
Hidden Chests and Loot Locations
Hogwarts Legacy loves rewarding thorough exploration, and “In the Shadow of the Study” is no exception. There are four hidden chests scattered throughout the quest area, though not all are immediately obvious.
Chest 1 sits in the first room you enter. Look to the left side near bookshelves, it’s tucked away but visible if you’re scanning the environment. No combat required: just walk over and loot it.
Chest 2 is locked behind a combat encounter. After defeating the first enemy wave, backtrack slightly to a side corridor. This chest requires a key found on one of the enemies you just defeated. Grab it and return to unlock the chest for consumables and some decent gear.
Chest 3 appears after the mini-boss encounter in what feels like a dead-end corridor. It’s easy to miss because the camera angle doesn’t naturally direct you there. When you see an archway on the study’s eastern wall, go through it. The chest sits at the far end.
Chest 4 is the hardest to find, it’s hidden behind a destructible wall in the final chamber. Use Diffindo or Bombarda on cracked stone surfaces you notice. The chest contains valuable spell loot and some of the quest’s best rewards.
If you’re farming specific gear or just want the coins, don’t rush. Take 10 minutes to thoroughly explore each room. Walls you can destroy often have slight visual differences, cracks, discoloration, or a slightly raised appearance. The game design is consistent about this.
Trait Challenges and Achievements
Several trait challenges tie specifically to this quest. If you’re hunting achievement completion or trying to unlock certain rewards through traits, know what you’re aiming for.
Combat Perfectionist: Complete the mini-boss encounter without taking damage. This requires precision with your dodges and positioning. Practice on regular enemies first, then attempt the mini-boss when you’re confident. Stupefy spam plus Protego blocking makes this doable, you just can’t panic-roll into attacks.
Speed Runner: Finish the entire quest in under 15 minutes. This is more about route optimization and aggressive play than perfect combat. Skip optional exploration if you’re chasing this achievement. Use spells with high-impact damage to burn through enemies quickly.
No Refunds: Defeat enemies using only environmental damage (fire, spikes, falls). This is silly but doable if you bait enemies into hazardous zones. Lure them toward spike traps or environmental hazards, then use knockback spells to trigger damage. It’s tedious but technically possible.
Seeker: Find all four hidden chests during the quest. This one requires thorough exploration, not speed or combat skill. Take your time and check every corner.
Trait challenges grant cosmetic rewards and unlock certain gear variations. They’re not required for story progression, but completionists should prioritize them. Most are intuitive once you understand the quest layout.
Tips for Troubleshooting Common Issues
Stuck on the Mini-Boss? If you’re getting slammed repeatedly, the issue usually comes down to spell rotation or positioning. Stop trying to burst it down instantly. Instead, focus on control: stun it with Stupefy, back away, cast one damage spell, then prepare for its next attack phase. Patience beats aggression here.
If you’re still struggling after adjusting tactics, your spell power might be too low. Equip better gear, farm Hogsmeade for upgraded robes and accessories that boost spell power. This sounds obvious, but many players overlook gear upgrades and wonder why damage feels weak. A 50-point gear upgrade is massive at this stage.
Can’t Find the Quest Marker? Make sure you’ve actually accepted the quest from your journal. The marker won’t appear if it’s just logged but not active. Open your menu, navigate to quests, and click “Track Quest.” The marker should appear instantly.
Enemies Seem Overpowered? You’re likely under-leveled. Grind a few side quests or enemy encounters in other areas to hit level 22-25. The difficulty spike isn’t artificial: you genuinely need that extra power.
Getting Lost in the Study Layout? The study building has multiple corridors that feel interconnected. Mark significant locations on your mental map: the entrance, the mini-boss arena, the final chamber. Most “getting lost” happens when you backtrack without remembering where certain corridors lead. Stick to the main path your quest marker points toward unless you’re intentionally exploring for chests.
Missing Collectibles? Use your camera mode (press designated button per platform) to look around corners and check tight spaces. Items that aren’t directly on your path are often tucked away. Take a screenshot of any hidden chests you find so you can reference them during trait challenge runs. Recent Hogwarts Legacy guides from RPG Site cover collectible-hunting techniques if you want more detailed breakdowns.
Frequent Crashes or Performance Issues? This quest has some complex environmental details that can tax lower-end systems. If you’re on PC, try lowering shadow quality or draw distance. Console players should ensure their system software is fully updated. Verify your game files if on PC (Steam/Epic validation). Contact the developer if issues persist, occasional bugs affect specific hardware configs.
Rewards and Story Implications
Quest Completion Rewards
Finishing “In the Shadow of the Study” nets solid rewards across multiple categories. First: XP. You’ll earn roughly 5,000-7,000 experience points depending on difficulty and whether you completed optional objectives. For context, that’s enough to push through 1-2 levels mid-game, meaningful but not game-breaking.
Second: Spell Unlock. You’ll unlock or significantly upgrade a specific spell relevant to later game segments. This isn’t just a random ability, it’s something the game expects you to have access to for upcoming content. Don’t ignore this unlock: make it a primary loadout spell immediately.
Third: Gear Drops. The quest rewards a piece of legendary equipment, robes or a wand depending on your current gear state. These items typically have strong stat rolls and unique appearance effects. They’re not mandatory, but they’re solid upgrades for most players around this level.
Fourth: Narrative Unlocks. Completing this quest opens new dialogue options in subsequent conversations and alters how certain characters interact with you. It’s not story-breaking, but it acknowledges your progress and creates branching dialogue paths.
Fifth: Map Reveals. You unlock access to a previously locked-off area tied to the study location. This area contains additional quests, collectibles, and optional challenges. It’s a legitimate gameplay expansion, not just lore flavor.
Impact on the Main Narrative
This quest isn’t a throwaway side mission, it’s integral to the main storyline. Completing it shifts the narrative’s direction, introducing new antagonistic forces and raising the stakes considerably. Characters you’ve been building relationships with react differently to you once you’ve completed this quest, acknowledging the knowledge and power you’ve gained.
Specifically, the quest resolves a major mystery introduced earlier in the game. If you’ve been wondering about certain character motivations or plot threads, this quest provides substantial answers. It also sets up the endgame content you’ll tackle in your final 10-15 hours of gameplay.
The experience also fundamentally changes how you approach later combat encounters. You’ll face enemy types that build on the mechanics this quest teaches you. The spells you unlock become relevant to boss battles you encounter afterward. From a narrative perspective, you’re no longer a first-year student fumbling through magic, you’re becoming someone genuinely dangerous.
Story-wise, there’s a concrete before-and-after moment. Before this quest, the world feels somewhat open-ended and exploratory. After completing it, the main storyline becomes more urgent and defined. New markers appear on your map, new dialogue urgently redirects you toward specific objectives, and the pacing accelerates.
For players interested in multiple playthroughs, decisions made during this quest don’t lock you out of major endings, but they do influence subtle story beats going forward. It’s worth experiencing at least once with the choices that feel natural to your character’s personality.
Conclusion
“In the Shadow of the Study” serves as a major checkpoint in your Hogwarts Legacy journey. It tests your combat fundamentals, rewards thorough exploration, and pivots the narrative toward its final act. With the strategies we’ve covered, proper spell selection, smart enemy prioritization, and methodical collectible hunting, you’re equipped to tackle this quest cleanly.
Remember: the quest isn’t a race. Take time to explore, absorb the atmosphere, and engage with the puzzle-solving mechanics. That’s where Hogwarts Legacy shines brightest. If you get stuck, revisit your gear and spell loadout, most issues stem from under-preparation rather than artificial difficulty.
Once you wrap this up, you’re positioned for the endgame content that follows. The spells you unlock become standard tools, and the knowledge you gain about the world opens up new possibilities. Compare your experience here with other major questlines by checking walkthroughs on Shacknews if you want broader context for how this fits into the larger game structure.
Good luck out there. You’ve got this.